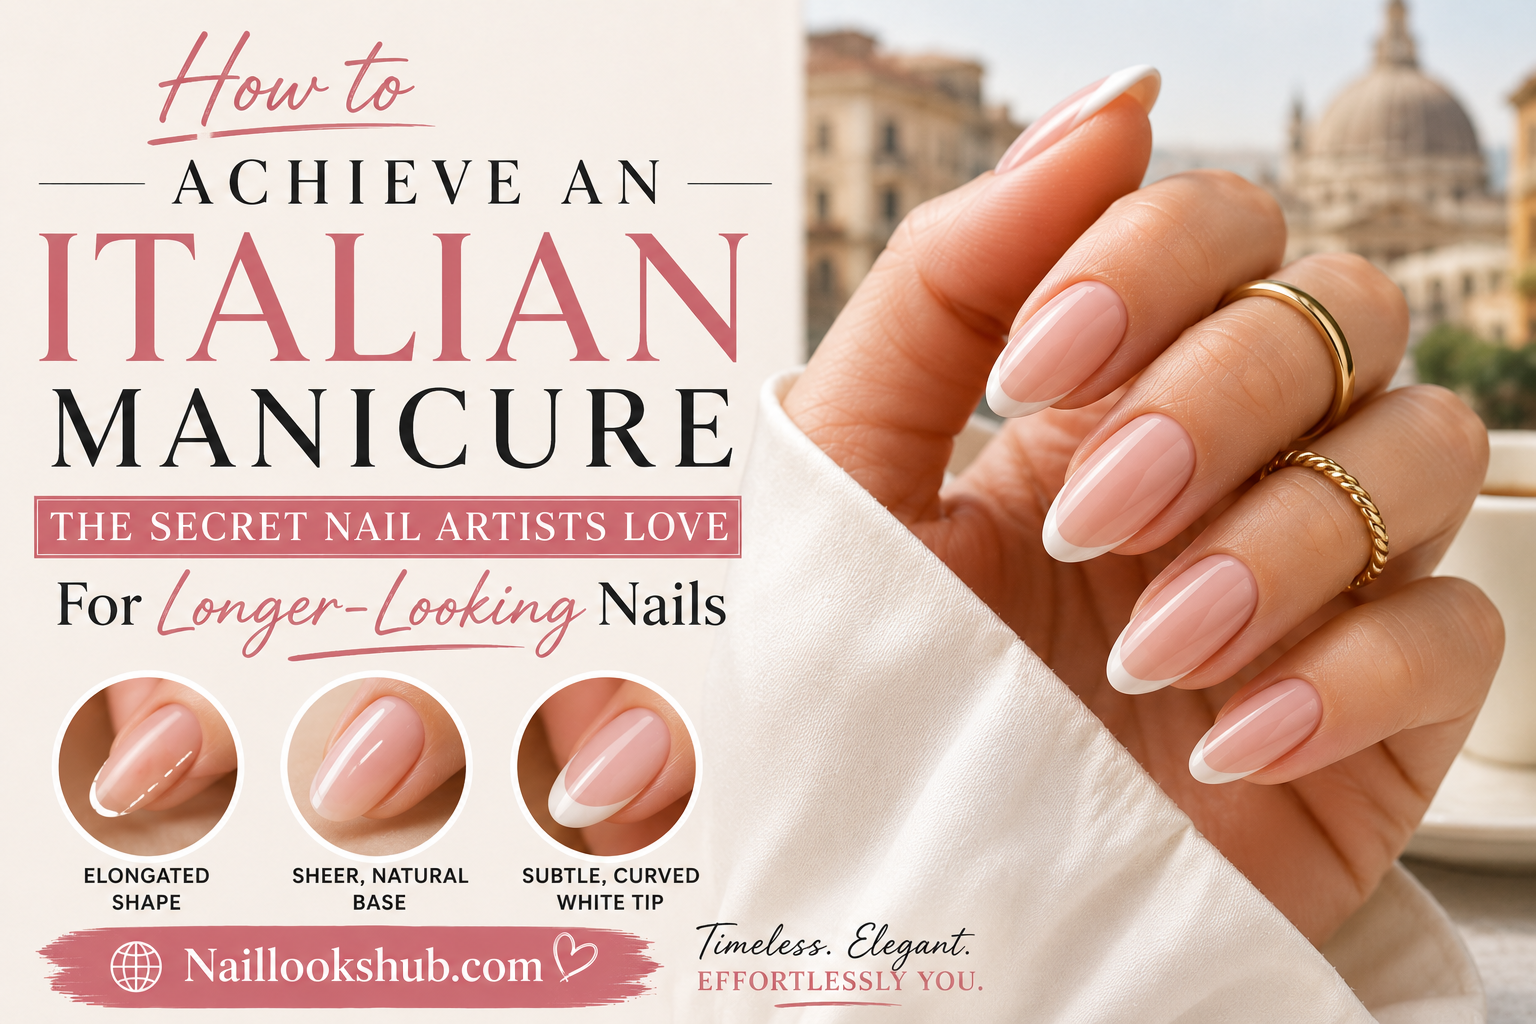
If you have scrolled through nail inspiration lately, chances are you have seen the term “Italian manicure” popping up everywhere. It is not a new nail shape or a trendy color. It is a technique, and once you understand it, you will see why professional nail artists quietly swear by it. This style is loved because it makes even short nails look longer, slimmer, and naturally elegant, without any extensions or acrylics involved.
In this guide, we will break down exactly what an Italian manicure is, why it works so well, the tools you need, and a full step by step tutorial you can follow at home or discuss with your nail technician. Let’s dive in. 🌸
💡 What Exactly Is an Italian Manicure?
An Italian manicure is a nail technique that focuses on the shape and proportion of the nail bed rather than adding extra product. The core idea is simple: instead of painting polish all the way to the edges of your cuticle and side walls, the nail artist leaves a thin unpainted margin along the sides of the nail. This creates an optical illusion that makes the nail plate appear narrower and, as a result, longer.
Think of it like a slimming effect for your nails. The same way a well tailored outfit can make you look taller, this manicure style uses color placement and shaping to elongate your fingers visually.
It is also sometimes referred to as the “your nails but better” manicure because it does not scream for attention. There is no bold nail art or glitter involved by default. It is subtle, polished, and incredibly natural looking, which is exactly why it has become such a favorite among minimalist nail lovers and busy professionals alike. 🤍
🇮🇹 Where Did the Italian Manicure Come From?
Despite the name, this technique is not officially tied to a documented Italian tradition in the way we might expect. Nail experts believe the term became popular because of the meticulous, tailored approach associated with Italian fashion and beauty culture, where clean lines, structure, and understated elegance are highly valued.
The style gained massive traction on social media platforms in recent years as people searched for nail looks that felt sophisticated but low maintenance. Nail artists began sharing the technique widely, and it quickly became one of the most requested looks in salons around the world.
🌟 Why Nail Artists Love the Italian Manicure
Here is why professionals keep recommending this method to their clients.
| Reason | Why It Matters |
|---|---|
| 📏 Elongates the nail visually | The unpainted side margins trick the eye into seeing a slimmer, longer nail bed |
| 💪 Works on any nail length | Even the shortest, most bitten down nails benefit from the elongating effect |
| 🎨 Low maintenance | Since polish does not touch the side walls, chips and lifting happen less often |
| ⏳ Longer wear time | The gap reduces friction points, so gel or regular polish tends to last longer |
| 🧼 Suits any nail health | Great for people recovering from nail damage or those growing out gel extensions |
| 🖤 Timeless look | It pairs with any outfit or occasion since the finish is naturally neutral |
Nail artists often say this technique is one of the easiest ways to make a manicure look “expensive” without spending extra time or money on nail art.
🧰 Tools and Products You Will Need
Before starting, gather everything so the process feels smooth and salon like from start to finish.
- Cuticle pusher 🪶
- Nail file (fine grit, around 180 to 240 grit)
- Buffer block
- Cuticle oil
- Base coat
- Sheer, nude, or soft pink polish (this is the classic Italian manicure color choice)
- A thin detail nail art brush or a striping brush
- Top coat
- Cotton pads and a small amount of acetone for clean up
- Optional: gel polish and a UV or LED lamp if you prefer a gel finish
Choosing the right polish shade matters here. Sheer pinks, soft nudes, and milky whites are the most popular because they blend naturally with your skin tone, enhancing that elongated illusion even further. 🌸
📝 Step by Step: How to Do an Italian Manicure at Home
Follow these steps carefully. Take your time, especially with the side margins, since precision is what makes this technique work.
Step 1: Prep Your Nails 🧽
Remove any old polish completely. Wash your hands and gently push back your cuticles using a cuticle pusher. Avoid cutting your cuticles aggressively, since healthy cuticles support nail growth and overall nail health.
Step 2: Shape Your Nails ✂️
File your nails into your preferred shape. Almond, oval, and squoval shapes tend to look best with the Italian manicure technique because their curves complement the slimming effect. Keep the length even across all nails for a cohesive look.
Step 3: Buff the Nail Surface 🪄
Lightly buff the top of each nail to remove shine and smooth out any ridges. This helps the polish adhere better and last longer.
Step 4: Apply Cuticle Oil, Then Wipe Clean 💧
Apply a small amount of cuticle oil around the nail bed to hydrate the skin. Wipe the nail plate clean afterward with a lint free wipe so no oil residue interferes with polish adhesion.
Step 5: Apply a Thin Base Coat 🎗️
Apply one thin layer of base coat, staying close to the cuticle line but avoiding the skin. Let it dry fully before moving to the next step.
Step 6: The Key Step, Painting the Margins 🎯
This is where the magic happens. Instead of sweeping polish edge to edge, dip your brush and wipe off the excess so you have a controlled amount of product. Starting from the center of the nail, paint a vertical line down the middle first. Then fill in toward each side, stopping about one to two millimeters before you reach the side walls. Leave that thin margin bare on both sides of the nail.
Do this consistently across all ten nails. It helps to look at your hand from a slight distance every few nails to check that the margins look even and proportional.
Step 7: Add a Second Coat If Needed 🖌️
If the color looks sheer or uneven, apply a second thin coat using the same margin technique. Sheer and nude polishes sometimes need two coats for a smooth, opaque finish.
Step 8: Seal With Top Coat ✨
Apply a glossy or matte top coat, again respecting the same margin boundaries. This locks in the color and adds shine or a soft matte finish, depending on your preference.
Step 9: Clean Up the Edges 🧴
Dip a small brush in acetone and gently clean up any polish that may have strayed onto the skin or side walls. Clean edges are essential for that crisp, salon quality finish.
Step 10: Moisturize and Finish 🤲
Finish with a final layer of cuticle oil or hand cream to keep the skin hydrated and looking healthy around your fresh manicure.
🎨 Best Colors for an Italian Manicure
While technically any polish color can be used, certain shades enhance the elongating illusion far better than others.
| Color Family | Effect | Best For |
|---|---|---|
| Sheer nude 🤎 | Blends with skin tone, maximizes the slimming illusion | Everyday, office friendly looks |
| Milky white 🤍 | Soft and bright, very trendy right now | Spring and summer seasons |
| Soft pink 🌸 | Classic, feminine, universally flattering | Almost any occasion |
| Chrome or shimmer nude ✨ | Adds dimension while staying subtle | Evening events |
| Clear gloss 💎 | The most minimal option, pure shine | Those wanting a barely there manicure |
Avoid dark, saturated colors like deep reds or black if your main goal is the elongating effect. Darker shades tend to visually widen the nail plate since the color contrast against skin is stronger, which can work against the illusion this technique is built on.
🙅♀️ Common Mistakes to Avoid
Even a simple technique can go wrong if a few key details are missed. Here are the most common errors people make.
- Leaving too wide of a margin, which makes the manicure look unfinished rather than intentional
- Leaving an uneven margin from nail to nail, which breaks the cohesive illusion
- Choosing a polish color that is too dark for the elongating effect to show
- Skipping cuticle prep, which leads to a messy, undefined nail bed shape
- Applying too much product, causing polish to flood into the margin area
- Rushing the process, since precision really does matter here more than in a typical manicure
Take your time, especially in the beginning. Like most nail art techniques, your speed and precision will improve with practice.
💅 Italian Manicure vs Regular Manicure vs French Manicure
People often confuse this style with other popular manicure types, so here is a quick comparison to clear things up.
| Feature | Italian Manicure | Regular Manicure | French Manicure |
|---|---|---|---|
| Polish coverage | Leaves thin margins on both sides | Covers the entire nail edge to edge | Covers nail base fully, white tip added |
| Visual effect | Elongates and slims the nail | No optical illusion effect | Classic, adds a defined tip line |
| Best nail shapes | Almond, oval, squoval | Any shape | Square, squoval |
| Maintenance | Lower, less chipping at edges | Standard | Standard, tip line may need touch ups |
| Overall vibe | Modern, minimal, natural | Classic, versatile | Timeless, polished |
Both styles are beautiful in their own way, but the Italian manicure has surged in popularity specifically because of how naturally elegant and low effort it looks day to day.
🕒 How Long Does an Italian Manicure Last?
If done with gel polish, an Italian manicure can last anywhere from two to three weeks with proper care, similar to a standard gel manicure. Regular polish versions typically last about five to seven days before touch ups are needed. Because the margins reduce contact with water, dishes, and daily friction at the nail edges, many people find this style tends to chip less around the sidewalls compared to a full coverage manicure.
🧴 Aftercare Tips to Make It Last Longer
- Apply cuticle oil daily to keep the nail bed and surrounding skin hydrated 💧
- Wear gloves while doing dishes or cleaning with harsh chemicals 🧤
- Avoid using your nails as tools to open packages or scratch surfaces
- Reapply a thin layer of top coat every few days to refresh shine and add protection ✨
- Keep nails at a consistent length as they grow to maintain the shape and proportion
- Moisturize your hands regularly since healthy skin enhances the overall look of the manicure
❓ Frequently Asked Questions
Can I do an Italian manicure on short nails? Yes. In fact, this technique is especially loved for short nails since the elongating illusion works beautifully even without added length.
Does it work with gel polish? Absolutely. Many nail artists prefer gel for this look since it allows for cleaner lines and longer wear.
Is it hard to do at home? It takes a bit of practice to get the margins even, but with a steady hand and a good detail brush, it is very achievable as a DIY manicure.
What nail shape works best? Almond, oval, and squoval shapes tend to complement the elongating effect the most, though it can be adapted to most nail shapes with slight adjustments.
Can I add nail art on top of an Italian manicure? Yes, though most people keep it minimal on purpose. A few delicate accents like a thin gold line or a single small design on one nail can look lovely without overpowering the clean aesthetic.
🌷 Final Thoughts
The Italian manicure proves that sometimes the most impactful beauty techniques are also the simplest. By focusing on proportion and subtle color placement instead of adding more product, this method delivers a longer looking, more elegant nail shape using nothing more than smart application. It is low maintenance, universally flattering, and easy to recreate once you understand the core technique of leaving those thin, precise side margins.
Whether you book it at your next salon appointment or try it yourself at home with a steady hand and the right tools, the Italian manicure is one nail trend that is absolutely worth the hype. Give it a try, and you might just find your new go to everyday manicure. 💅🌸✨